
Users
The Users screen displays all the users that are configured for a selected organisation in a table, as shown below:
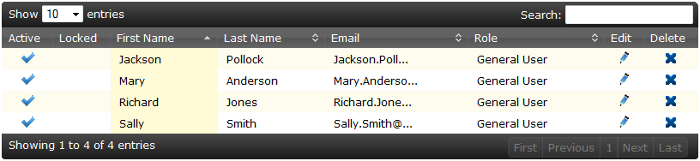
The table includes the following information:
| Column | Action | Description | ||||||
|---|---|---|---|---|---|---|---|---|
| Active |
|
|||||||
| Locked | Unlock User |
|
||||||
| First Name | Edit User | The first name of the user. | ||||||
| Last Name | Edit User | The last name of the user. | ||||||
| Edit User | The email address of the user. | |||||||
| Role | Edit User | The user role controls access to the application. There are currently three available roles, which are:
|
||||||
| Edit | Edit User |
|
||||||
| Delete | Delete User |
|


Create User
To create a new user, click the  button at the top left of the screen
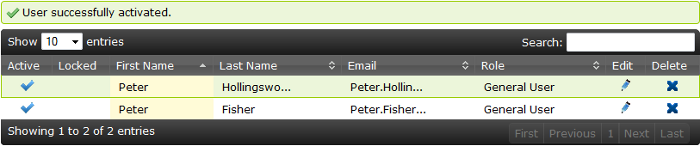
Activate User
To activate a user, click the  symbol that indicates they are currently deactivated. This will alter the user state and the list of users will update accordingly:
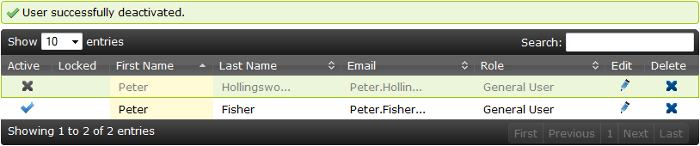
Deactivate User
To deactivate a user, click the  symbol that indicates they are currently activated. This will alter the user state and the list of users will update accordingly:
Unlock User
To unlock a user, click the  symbol that indicates they are currently locked. This will unlock the account and the list of users will update accordingly:

Delete User
To delete a user, click the delete button. A confirmation dialog will appear, as shown below:
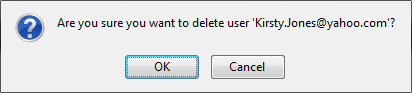
Click Cancel to return to the table without changes or OK to delete the user.
When the user is deleted a success message will be displayed at the top of the user table, as shown below:
